Effective Ways to Boil Shrimp with Shell for Perfect Flavor in 2025
Effective Ways to Boil Shrimp with Shell for Perfect Flavor in 2025
Boiling shrimp with shell on is a culinary art that enhances the natural flavors of this delectable seafood. When done right, it results in perfectly tender shrimp with an irresistible taste. In this guide, we’ll explore the best practices for how to boil shrimp, the ideal boiling times, and some cooking tips to achieve the best shrimp flavor, ensuring a delightful dining experience. Whether you’re preparing for a seafood boil party or a quiet dinner at home, mastering these shrimp boiling techniques will elevate your meal significantly.
Understanding Boiling Shrimp Time
Determining the right **boiling shrimp time** is crucial for achieving perfectly cooked shrimp. The cooking duration depends on several factors, including the size of the shrimp and whether they are fresh or frozen. Generally, **boiling shrimp** should take anywhere from 2 to 5 minutes. For shell-on shrimp, start timing as soon as they have been added to the boiling water. The indicator that shrimp are done includes color change to a vibrant pink and the flesh becoming opaque. Larger shrimp might need slightly more time; if you’re curious about **shrimp size cooking time**, remember that an average shrimp of medium size takes about 3-4 minutes to fully cook.
Optimal Shrimp Water Ratio
The **optimal shrimp water ratio** can also affect cooking time and flavor. A good rule of thumb is to use one quart of water for every pound of shell-on shrimp you plan to boil. Adding **seasonings** such as salt or acidity from lemon juice can significantly enhance flavors. For a classic approach, consider a 1 tablespoon of salt per quart of water, adjusting based on your taste preferences. Boiling the shell-on shrimp in well-seasoned water can greatly improve overall flavor and make your dish truly mouth-watering.
Monitoring Shrimp Cooking
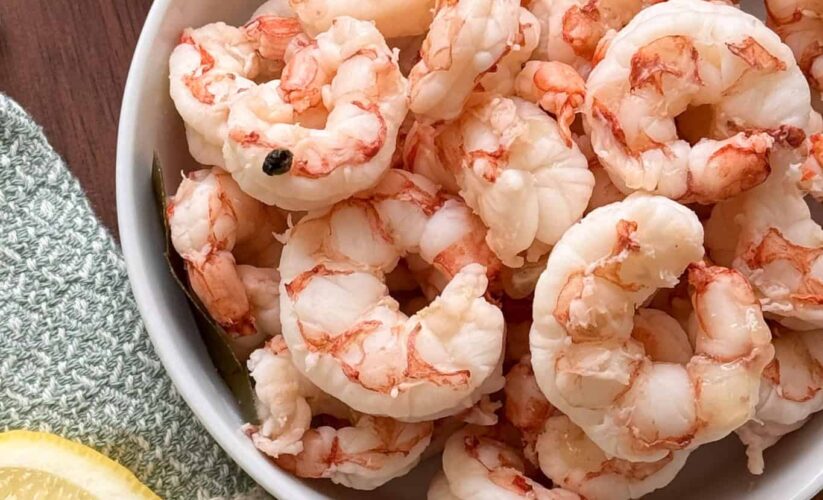
As the shrimp boils, it’s essential to monitor the cooking process. You can use the **appearance of cooked shrimp** as a guideline to check doneness; shrimp should curve into a C-shape when perfectly cooked. Avoiding overcooking is key – once the shrimp turn bright pink, immediately remove them from heat to prevent rubbery texture. This is one of the best practices for boiling shrimp: swift removal and immediate cooling in cold water can retain moisture and prevent further cooking.
Boiling Techniques for Perfect Shrimp
Different **shrimp boiling methods** can be employed to create the perfect boiled shrimp. Each technique may alter the taste and texture slightly, so experimenting with several approaches is wise. Here are a few popular methods to try, depending on your cooking style and preference.
Classic Boiling Method
The classic method of **boiling shrimp** involves bringing a large pot of water to a rolling boil, adding salt, and then adding the shrimp. Once they are added, it’s important to cover the pot but remove it from the heat immediately after the shrimp are added, which allows the shrimp to cook in the residual heat. This technique ensures that the shrimp do not overcook. The water temperature during the process aids in achieving a **perfect shrimp texture**, maintaining their natural juices and flavors.
Flavored Shrimp Boiling
Adding flavor to your boiling water can dramatically improve the taste of your shrimp. Using **boil shrimp seasoning** ensures every bite bursts with interest. Ingredients like fresh garlic, bay leaves, and whole peppercorns can be added to the boiling water. If you want an infused flavor profile, consider adding a splash of hot sauce or a squeeze of lemon just before serving for a zesty finish. This method elevates typical shrimp dishes into something special—think shrimp tacos or chilled shrimp cocktail that your guests will rave about.
Common Shrimp Cooking Tips
Having some essential **shrimp cooking tips** at your disposal can simplify the process and enhance your cooking experience. The following suggestions address some key areas of shrimp preparation and ensure optimal results.
Clean Shrimp Before Boiling
Cleaning your shrimp before boiling is vital, especially for **shell-on shrimp** recipes. Use cold water to rinse your shrimp thoroughly while removing the sand and dirt. For those wanting to minimize the mess, consider pre-packaged clean shrimp, which simplifies the cleaning process. However, cleaning fresh shrimp gives you more control over freshness and flavor. Proper handling prior to boiling ensures a clean and enjoyable eating experience.
Shell Removal After Boiling
Many seafood lovers appreciate the succulent flavor of **cooked shrimp shells**, considering them a pivotal element in seafood preparation. However, if your recipe requires peeled shrimp, easily remove the shells with your fingers or a small knife after boiling. Shell removal is simpler while the shrimp are still warm. This adaptability allows you to cater to your preference or that of your guests when preparing your shrimp dish.
Quick Seafood Boating Finishing Touches
Finishing touches can elevate your boiled shrimp dish to new heights. Consider what awaits on the plate alongside your freshly boiled shrimp to ensure a delightful experience. Side options, sauces, and presentation all play a role in serving, but let’s discuss some finishing touches that bring it all together.
Shrimp Serving Suggestions
When serving your boiled shrimp, think about how to present them appealingly. A platter of fresh shrimp over ice, garnished with lemon wedges, celery sticks, and cocktail sauce, makes a substantial statement. Or, consider creating a shrimp boil platter featuring corn, potatoes, and sausage for a more traditional gathering. An attractive splay not only enhances taste experience but also excites your guests visually, making it a memorable meal.
Enhancing Shrimp Flavor
For those wishing to take their shrimp boiling to the next level, **herbs for shrimp boiling** are your new best friends. Freshly chopped parsley, dill, or chives sprinkled atop ready shrimp adds not only brightness of flavor but also attractive contrast. Additionally, a drizzle of olive oil and a sprinkle of sea salt brings out the natural sweetness of the shrimp without overwhelming it. Carefully considered enhancements can vastly impact overall satisfaction in every bite.
Key Takeaways
- Perfect boiling shrimp requires accurate timing based on size and condition.
- Flavorful boiling methods, including seasoning and herbs, can transform your dish.
- Proper preparation and cleaning of shrimp ensure a delightful dining experience.
- Creative serving suggestions elevate presentations and appeal during mealtime.
FAQ
1. How long to boil shrimp tails?
When boiling shrimp tails, the cooking time remains consistent with standard shrimp, typically between 2 to 5 minutes. Ensure that tails turn bright pink and opaque before removing from heat to avoid overcooking.
2. What are common shrimp boiling pitfalls?
Overcooking is the most frequent mistake made when boiling shrimp. Secondly, skimping on flavor during preparation can lead to bland dishes. Always observe the cooking time and add quality seasonings to create rich, tasty shrimp.
3. Can I boil frozen shrimp without thawing?
Yes, you can **boil frozen shrimp** without prior thawing. However, cooking time may increase by a minute or two. Add them to boiling water directly and monitor until the shrimp are fully cooked.
4. What variations exist on traditional shrimp boils?
Variations on a **traditional shrimp boil** may include ingredients like sausage, corn, and potatoes integrated in the boiling process. You can also experiment with different seasonings based on regional cuisine or personal taste.
5. How can I tell if boiled shrimp are done?
**How to tell if shrimp is done**: Perfectly cooked shrimp will change color to a vibrant pink and curl into a C-shape. The flesh will be opaque, indicating readiness. Pay attention to these cues to achieve the perfect bite.