Best 5 Ways to Dye Eggs with Food Coloring for a Creative 2025!
“`html
Best 5 Ways to Dye Eggs with Food Coloring for a Creative 2025!
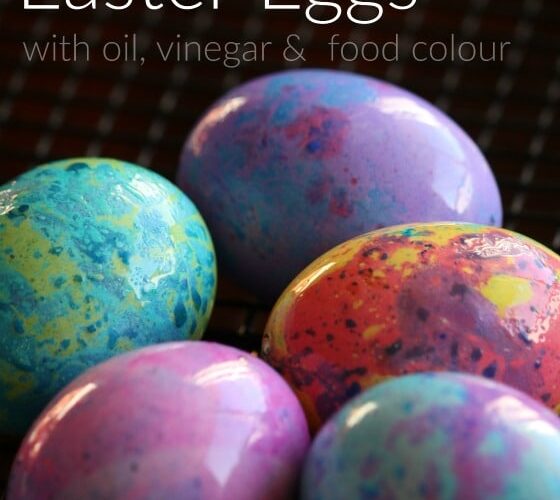
Dyeing eggs is a fun and creative activity that brings joy and color into any festive occasion, especially Easter. Whether you’re seeking to create stunning vibrant colors or opting for soft pastels, there are numerous expert techniques for making your own unique egg designs. Below are the best five methods to dye eggs using food coloring, aimed at crafting colorful and vibrant eggs that everyone will love.
Dyeing Eggs with Food Coloring: The Basics
Whether you are a beginner looking to explore egg dyeing or an experienced decorator searching for new egg decorating ideas, understanding the basics of using food coloring is essential. To start dyeing eggs safely, you’ll need some essential supplies including hard-boiled eggs, distilled white vinegar, water, and food coloring. Mixing these ingredients creates a vibrant egg dye that will adhere beautifully to the eggs. When using food color, remember to use food-safe options to ensure that your fun remains safe for eating.
Using Vinegar for Egg Dyeing
One crucial step in **how to dye eggs** is to use vinegar. When mixing vinegar with water and food dye, vinegar helps the dye bond more effectively to the egg, resulting in brighter colors. Start by combining one cup of water with one tablespoon of vinegar and several drops of food coloring in a bowl. Dip each egg into this solution and leave it to soak for a few minutes. This technique not only provides vivid hues but also ensures that the colors last longer on the eggs.
Making Vibrant Egg Colors with Food Dyes
When aiming for **vibrant colors for eggs**, you can adjust the concentration of your dye solution. The more food coloring you add, the richer the color of your dye will be. If your goal is to create unique shades, experiment by mixing different colors together. For instance, combining blue and yellow food dyes can yield stunning shades of green. Another tip is to layer colors; allow one color to dry before applying another, enabling multi-toned effects that make your *egg decorating* even more creative.
Easy Egg Dyeing with an Egg Dye Kit
If you’re looking for an easier method, consider investing in a commercial **egg dye kit**. These kits typically include vibrant food colors, protective gloves, and even decorating tools. Following the **egg dyeing process** provided in the kit is simple and helps ensure that you achieve great results without any guesswork. Most kits offer reusable colors and can be tailored to create themes such as pastel Easter eggs or even unique patterns. You can also incorporate traditional methods into skilled coloring techniques using these kits!
Creative Techniques for Coloring Hard-Boiled Eggs
Once you master the basics of dyeing eggs, it’s time to explore advanced *egg painting techniques*. This creativity can take your designs to the next level. Here are some unique techniques to add flair to your egg designs:
Using Rubber Bands for Patterns
One of the fun **egg decorating tips** involves utilizing rubber bands to make interesting patterns on your eggs. Simply wrap rubber bands around the eggs before dipping them into the dye. This technique allows for design creativity as the dye only colors the areas that are exposed, yielding stunning geometric designs once the rubber bands are removed. Besides adding a unique twist to your dyeing process, it is a great families or children’s activity that sparks creativity!
Creating Pastel Eggs with Natural Dyes
An excellent alternative to commercial **food coloring** is creating **natural egg dye**. Using vegetables, spices, and other natural ingredients can produce beautiful pastel hues. For example, boiled red cabbage can create pleasing blue shades, while turmeric generates a lovely yellow. Steeping these ingredients in water along with vinegar creates dyes safe for eggs while showcasing *eco-friendly egg dyeing*. Experimenting with natural dyes leads to not only sustainable outcomes but also engages children in learning about the benefits of using plants.
Preserving and Displaying Your Beautiful Dyed Eggs
After dyeing and decorating your eggs, a common question arises about how to best preserve and showcase your creations. Cleaning, drying, and choosing a storage place is vital to maintain your colorful Easter eggs’ beauty.
Cleaning Up After Dyeing to Preserve Your Work
Post-dyeing cleanup is essential to necessary to protect your hard work. Use a gentle dish soap solution to wash any leftover food dye from your hands or tools. For keeping your dyed eggs in pristine condition, consider placing them in a decorative container or an egg carton lined with soft materials.
Creative Display Ideas for Dyed Eggs
Once you’ve perfected your egg designs, think about how best to show them off! You can create beautiful centerpiece displays using baskets filled with straw or moss, or decorate shadow boxes to highlight your artwork. Another fun idea is to hang dyed eggs from ribbons or strings in windows for visually stunning effects. This simple step **showcases dyed eggs** as unique pieces of art in your home.
Key Takeaways
- Using vinegar is a crucial step for long-lasting** dyeing eggs**
- Do not hesitate to experiment with color mixing for **vibrant egg colors**.
- Natural dyes can yield lovely pastel shades while being eco-friendly.
- Clean and preserve your dyed eggs with proper cleanup and storage.
- Creative displays can enhance the enjoyment of your stunning decorated eggs.
FAQ
1. How can I make my own natural egg dye?
You can create personal and beautiful *homemade egg dye* using various natural ingredients. For example, you can boil chopped red cabbage for blue hues, while turmeric will provide a bright yellow. Combine your chosen natural ingredient with water, add vinegar, and soak your hard-boiled eggs in the mixture to achieve vibrant colors.
2. What are some best practices for dyeing eggs with children?
Ensure to supervise children while dyeing eggs for safety, particularly when using vinegar and dyes. Provide waterproof gloves and allow them to make creative decisions on colors. You can also prepare solutions ahead of time to streamline the process, which will enhance the *educational aspect of the experience*.
3. How long should dye sit on eggs for the best results?
To achieve bright and vibrant colors, allow your eggs to soak in the dye solution for at least 5-10 minutes, checking the color regularly. The longer they sit, the more intense the color will be; you can also experiment with different soak times to develop unique effects.
4. Can I reuse the egg dye solutions?
Yes, leftover dye solutions can be stored and reused for future projects! Strain out any solids and keep your dyes in sealed containers in the refrigerator. Don’t hesitate to experiment or refresh the solutions with more food coloring if necessary.
5. What safety tips should I consider while dyeing eggs?
Always work in a well-ventilated space when handling food dyes and vinegar. Wear gloves to avoid dye staining your skin and keep dye solutions away from small children and pets. Use **safe food coloring** to ensure the dyed eggs are safe for consumption.
“`