How to Properly Indent in Word: Smart Techniques for 2025
How to Properly Indent in Word: Smart Techniques for 2025
Indentation is a fundamental aspect of text formatting in Microsoft Word that significantly impacts the overall document layout. Mastering how to properly indent your text can enhance readability and contribute to a more professional appearance. In this article, we will explore effective techniques for setting up your indents using Word’s features, keyboard shortcuts, and best practices tailored for 2025.
Understanding Indentation in Microsoft Word
In the realm of word processing, the different types of indentation found in Microsoft Word serve varying purposes. For instance, **first line indent**, **hanging indent**, and **negative indentation** are essential tools for transforming your text’s appearance. Learning to leverage these options can make a substantial difference, particularly in academic and professional writing.
Types of Indentation Options
Getting familiar with the various indentation options is crucial for effective paragraph settings. The most common types include:
- First Line Indent: This indent allows just the first line of a paragraph to be indented, which is helpful for distinguishing new paragraphs.
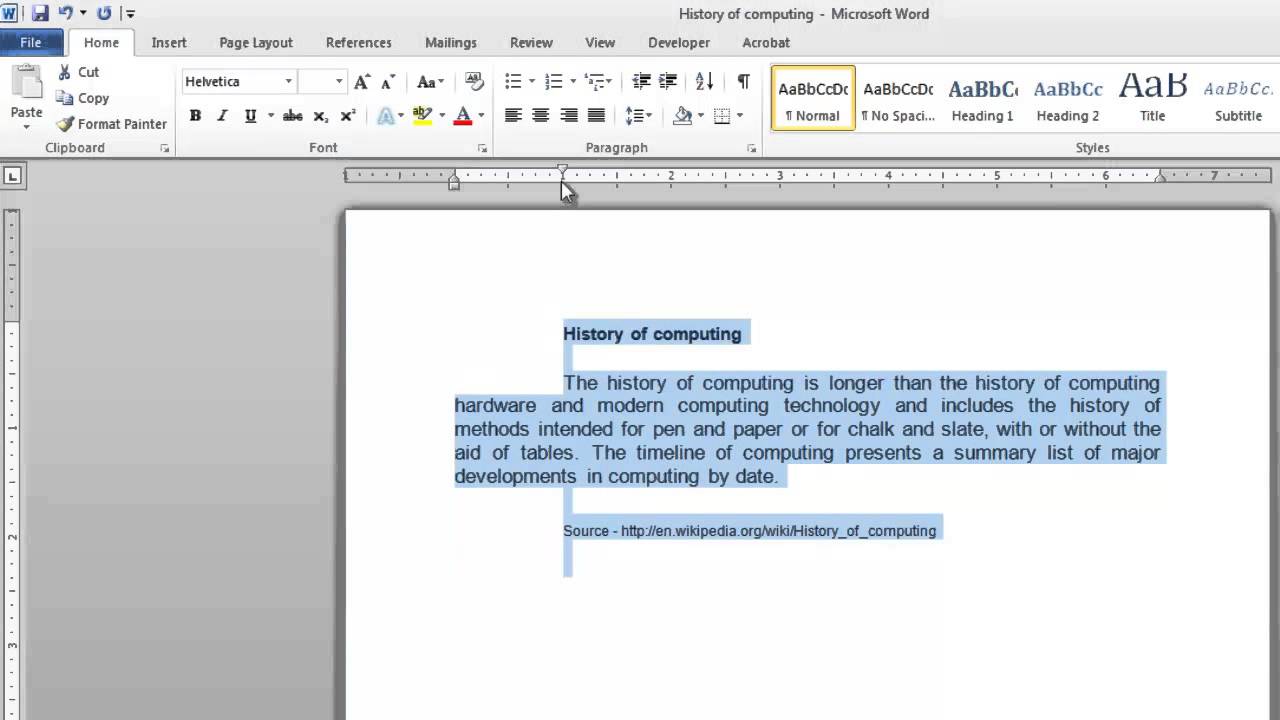
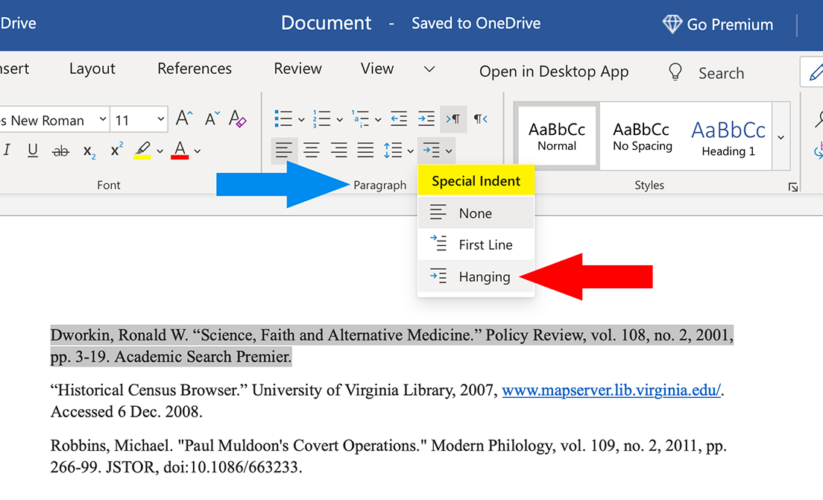
- Hanging Indent: Used frequently in bibliographies, this indent format leaves the first line flush with the left margin while indenting subsequent lines.
- Left and Right Indents: You can adjust the overall position of the text within a paragraph from both the left and right margins, allowing for greater control over your document layout.
How to Adjust Indentation Settings
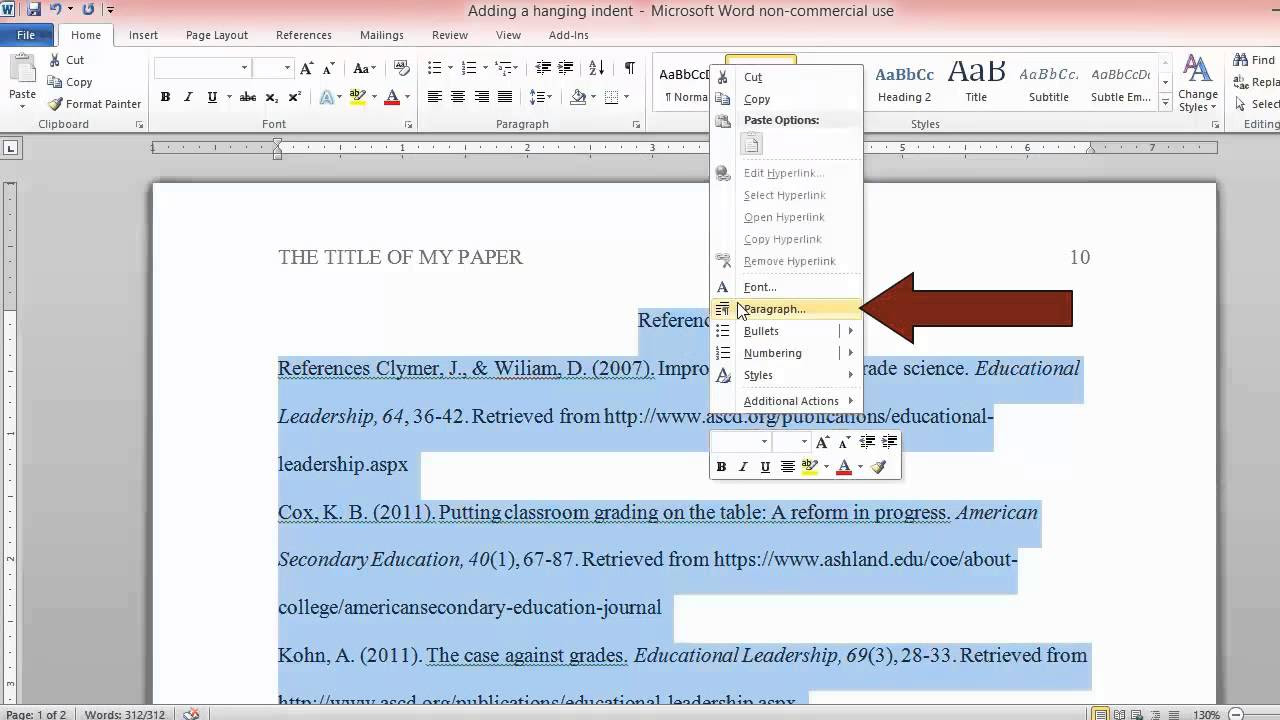
To adjust indentation settings in Microsoft Word, you can follow these simple steps: Go to the paragraph settings dialog box where you will find fields to customize your left, right, and special indents. Utilize the **Ruler** for a more visual method—by simply dragging the indent markers to the desired location. Inserting tab stops can also streamline this process, allowing you to set consistent indentations throughout your document.
Keyboard Shortcuts for Quick Indentation
Keyboard shortcuts are valuable for enhancing your text editing efficiency. For indentation, you can use Ctrl + T to create a hanging indent or Ctrl + M to increase the left indent, while Ctrl + Shift + M decreases it. Remember that utilizing these shortcuts can save time and help maintain a focused flow while working on document editing.
Applying Advanced Indentation Techniques
Mastering basic indentation is one thing, but applying advanced techniques can elevate your document significantly. Using features like **smart indentation adjustments** and **automatic bullet lists** can aid in achieving a clean, professional finish to your documents.
Customizing Indent Levels
For documents requiring a precise format, you may wish to specify custom indent levels. This involves adjusting the standard indent sizes based on your style guide. Adjust the **indent levels** by defining precise measurements in the paragraph settings. This is particularly useful in academic writing and professional documents where format consistency is paramount.
Utilizing Ruler Adjustments and Tab Stops
The **ruler** in Word is an underutilized feature that can provide visual clarity. You can access it from the View tab. By adjusting the **indent guides** on the ruler, users can control the space allocated for each paragraph directly. Similarly, **tab stops** can be inserted to align text where needed, improving both readability and aesthetic appeal.
Aligning Text for Different Document Layouts
Each document layout may necessitate a different approach to text alignment and indentation. When working on reports, you may want to center headings with a set indentation level, while academic papers often require left-aligned paragraphs for the body. Adjust these settings appropriately in conjunction with your overall page layout for professional presentation.
Enhancing Document Formatting with Indents
Beyond merely improving aesthetics, proper indents can enhance the functionality of your documents. For example, managing bulleted or numbered lists alongside correct **paragraph indentation** can tremendously improve user engagement and document navigation.
Using Indents with Bullet Points and Numbered Lists
When crafting lists, proper indents not only differentiate ideas but also offer functional clarity. By changing the **indentation options** within list settings, users can create effective **bullet lists** that draw attention and provide clear mappings of hierarchical information.
Integrating Footnote and Endnote Formats
When dealing with citations in your work, especially in academic settings, effective footnote formatting becomes critical. Ensure that your footnotes reflect consistent hierarchical indentation using the hanging indent option. This practice of meticulous formatting applies equally to **endnotes**, reinforcing consistency throughout your citation formatting.
Enhancing Document Templates with Indentation
Document templates can vastly accelerate your workflow, especially when you consistently use similar >document editing styles. Incorporating correct indentation within your template settings guarantees that every new document maintains desired formatting parameters. Save your customized formatting as a template to streamline future work, keeping everything within your established style guide.
Conclusion
Properly indenting text in Microsoft Word covers various aspects, from basic settings to advanced customization techniques. Whether for document layout purposes or strict adherence to formatting rules, understanding and mastering indentation will immensely improve the professionalism of your documents. With regular practice and the application of keyboard shortcuts, you can become proficient in these smart techniques for 2025.
FAQ
1. What is a hanging indent and when should I use it?
A hanging indent is a formatting style where the first line of a paragraph is flush left, while the subsequent lines are indented. This is ideal for bibliographies or works cited pages, making the source entries clear and organized.
2. How can I reformat a document to change indentation throughout?
To reformat indentation across your document, select the paragraphs you wish to change. Access the paragraph settings, adjust the indentation options as needed, and use styles to quickly apply these settings to your document.
3. Is there a way to reset indentation to default settings in Word?
Yes, to reset indentation to the default settings, you can select the paragraphs you want to modify, access the paragraph settings, and click on ‘Clear Formatting’ or manually set all indents to zero.
4. How do page margins affect indentation?
Page margins define the space around your text, influencing how text is rendered against the page edges. Proper management of page margins combined with indent settings can enhance overall text flow and document readability.
5. Can I save my indentation settings for future documents?
Absolutely! You can save your customized indentation settings as part of a document template or style in Word. This allows you to maintain consistent indentation across multiple projects without the need for repeated adjustments.
Key Takeaways
- Understand different types of indentation to improve document formatting.
- Utilize keyboard shortcuts for efficient editing.
- Custom indentation settings enhance both aesthetics and functionality.
- Integrate proper indentations into your document templates for consistent formatting.
- Use the ruler and tab stops for intuitive adjustments.
Embrace these techniques and transform how you create and format your documents, ensuring that you remain ahead in 2025! For visual guidance, consider using the accompanying images depicting various indentation techniques in Word: